Mapping with TrenchBroom and Func Godot
While setting up func_godot I found the documentation
very overwhelming as a beginner - everything you need is there, but
it's not laid out in a step by step easy to follow process.
The following is a personal guide that I made if I ever have to set up a project again.
Table of Contents
Required files
The following resources are required:
- Release of Func Godot (2024.1.1 used)
- TrenchBroom (2024.1 used)
- Godot 4 (v4.2.2.stable.arch_linux used)
yay -Syyu godot trenchbroom-bin
Getting Started
Setting up Godot
Before setting up TrenchBroom you must first set up the plugin - since it will generate files required for TrenchBroom.
- Create a new Godot project and copy the
addonsfolder from your Func Godot release into the project root - Navigate to "Project" > "Project Settings" > "Plugins" and enable the plugin
- Create the folders
trenchbroom&trenchbroom/texturesin your project root - Open
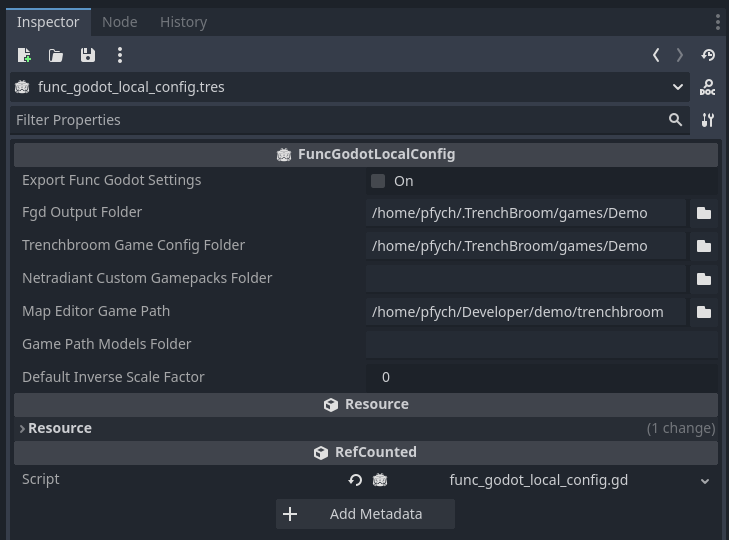
res://addons/func_godot/func_godot_local_config.tresand set the following fields:- Fgd Output Folder: This is where the custom
TrenchBroom game definition will live. Set the value to
something like this:
/home/user/.TrenchBroom/games/demowhere "user" is your username and "demo" is the name of your project.
- TrenchBroom Game Config Folder: This should be exactly the same as "Fgd Output Folder"
- Map Editor Game Path: Set this path to the
"TrenchBroom" folder in your Godot Project:
/home/user/Developer/demo-godot/trenchbroom
- Fgd Output Folder: This is where the custom
TrenchBroom game definition will live. Set the value to
something like this:
- Click "Export Func Godot Settings" - It looks like a toggle, but it's actually a button.
- Right-click the
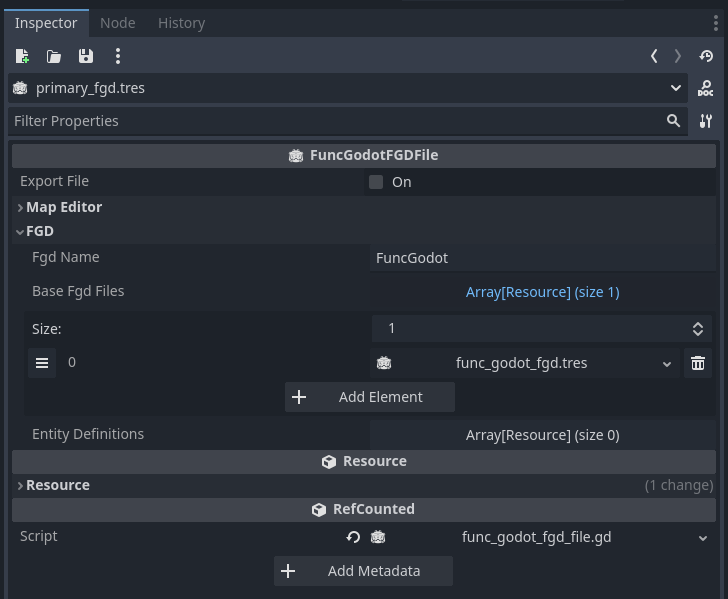
trenchbroomfolder in your project root and "Create New" > "Resource" - Create a new
FuncGodotFGDFileand save it in the trenchbroom folder as "primary_fgd.tres" - Set the "Base FGD File" value to
res://addons/func_godot/fgd/func_godot_fgd.tres
- Open
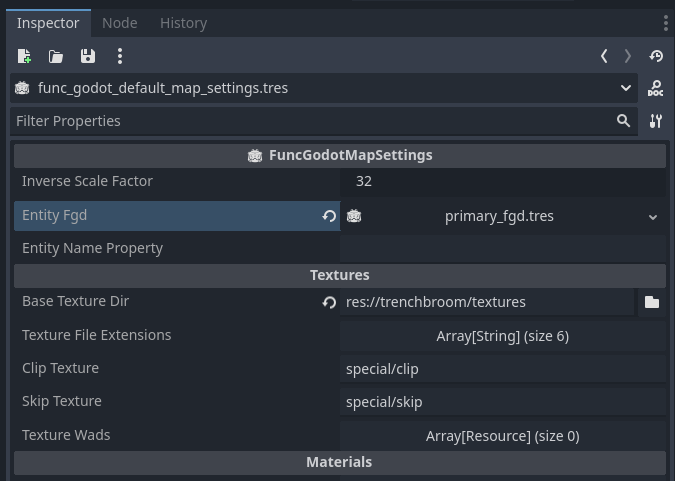
res://addons/func_godot/func_godot_default_map_settings.tresand set the following:- Entity Fgd: Set this to the FGD we created
earlier
- i.e.
res://trenchbroom/primary_fgd.tres
- i.e.
- Base Texture Dir: Set this to your map texture
directory.
- i.e.
res://trenchbroom/texturesto keep map textures separate to game textures
- i.e.
- Entity Fgd: Set this to the FGD we created
earlier
- Next open
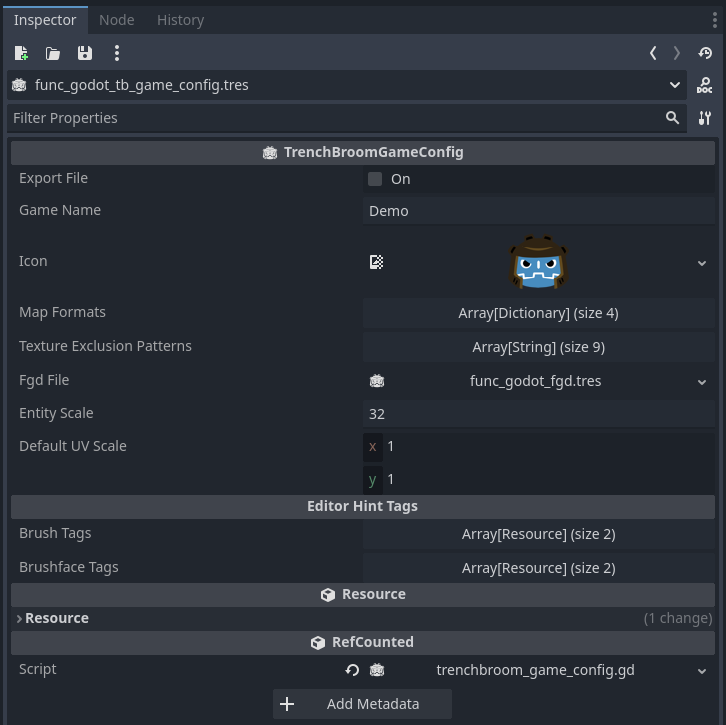
res://addons/func_godot/game_config/trenchbroom/func_godot_tb_game_config.tresand set the following:- Game Name: The folder name you wrote in
"Fgd Output Folder"
- i.e.
Demo
- i.e.
- Game Name: The folder name you wrote in
"Fgd Output Folder"
- Click "Export File"
Configuring TrenchBroom
- Open TrenchBroom and click "New map..."
- Click "Open preferences..."
- Your games name should be listed in the games list - select it
- Set the game path to the
res://trenchbroom/folder in your Godot project root- i.e.
/home/user/Developer/demo/trenchbroom
- i.e.
- Click "Apply" the "Ok"
- Select your game from the right hand list then click "Ok"
- Save the newly created map to your Godot project
- i.e.
/home/user/Developer/demo/maps/
- i.e.
Compiling the map in Godot
- Back in Godot create a new 3D scene and save it
- i.e.
res://scenes/main.tscn
- i.e.
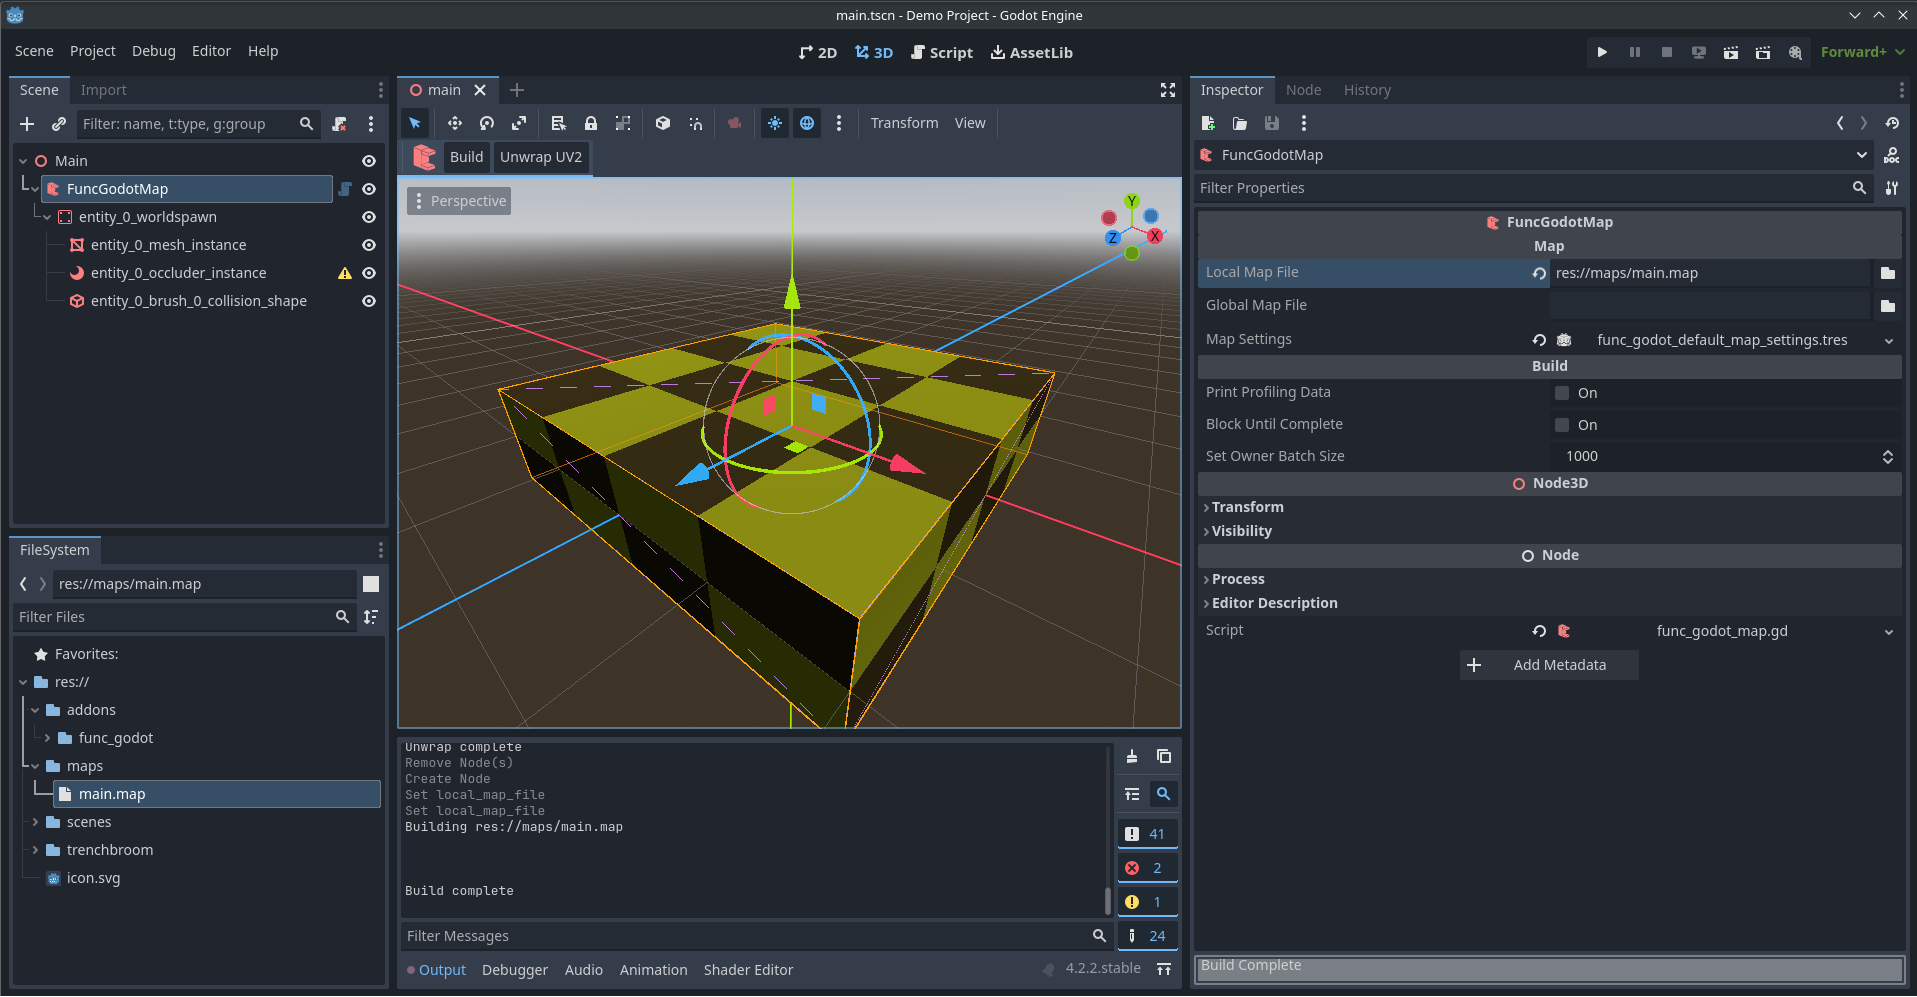
- Add a
FuncGodotMapnode to this scene - Set the "Local Map File" to the map you just saved
- i.e.
res://maps/main.map
- i.e.
- Click Build in the toolbar - You should see the default TrenchBroom cube as a mesh in Godot
Adding Textures
I use a site like AmbientCG for quick textures - I'll be using this brick texture in 4K as an example
- Copy your texture jpg into
res://trenchbroom/textures- If your texture comes with normals, ao, roughness,
displacements etc do the following:
- Create a folder with the same name as the root texture
res://trenchbroom/textures/bricks
- Copy the files into this folder with the following naming
convention:
bricks_ao.jpg- Ambient occlusionbricks_roughness.jpg- Roughnessbricks_displacement.jpg- Displacementbricks_normal.jpg- Normal maps
- Create a folder with the same name as the root texture
- If your texture comes with normals, ao, roughness,
displacements etc do the following:
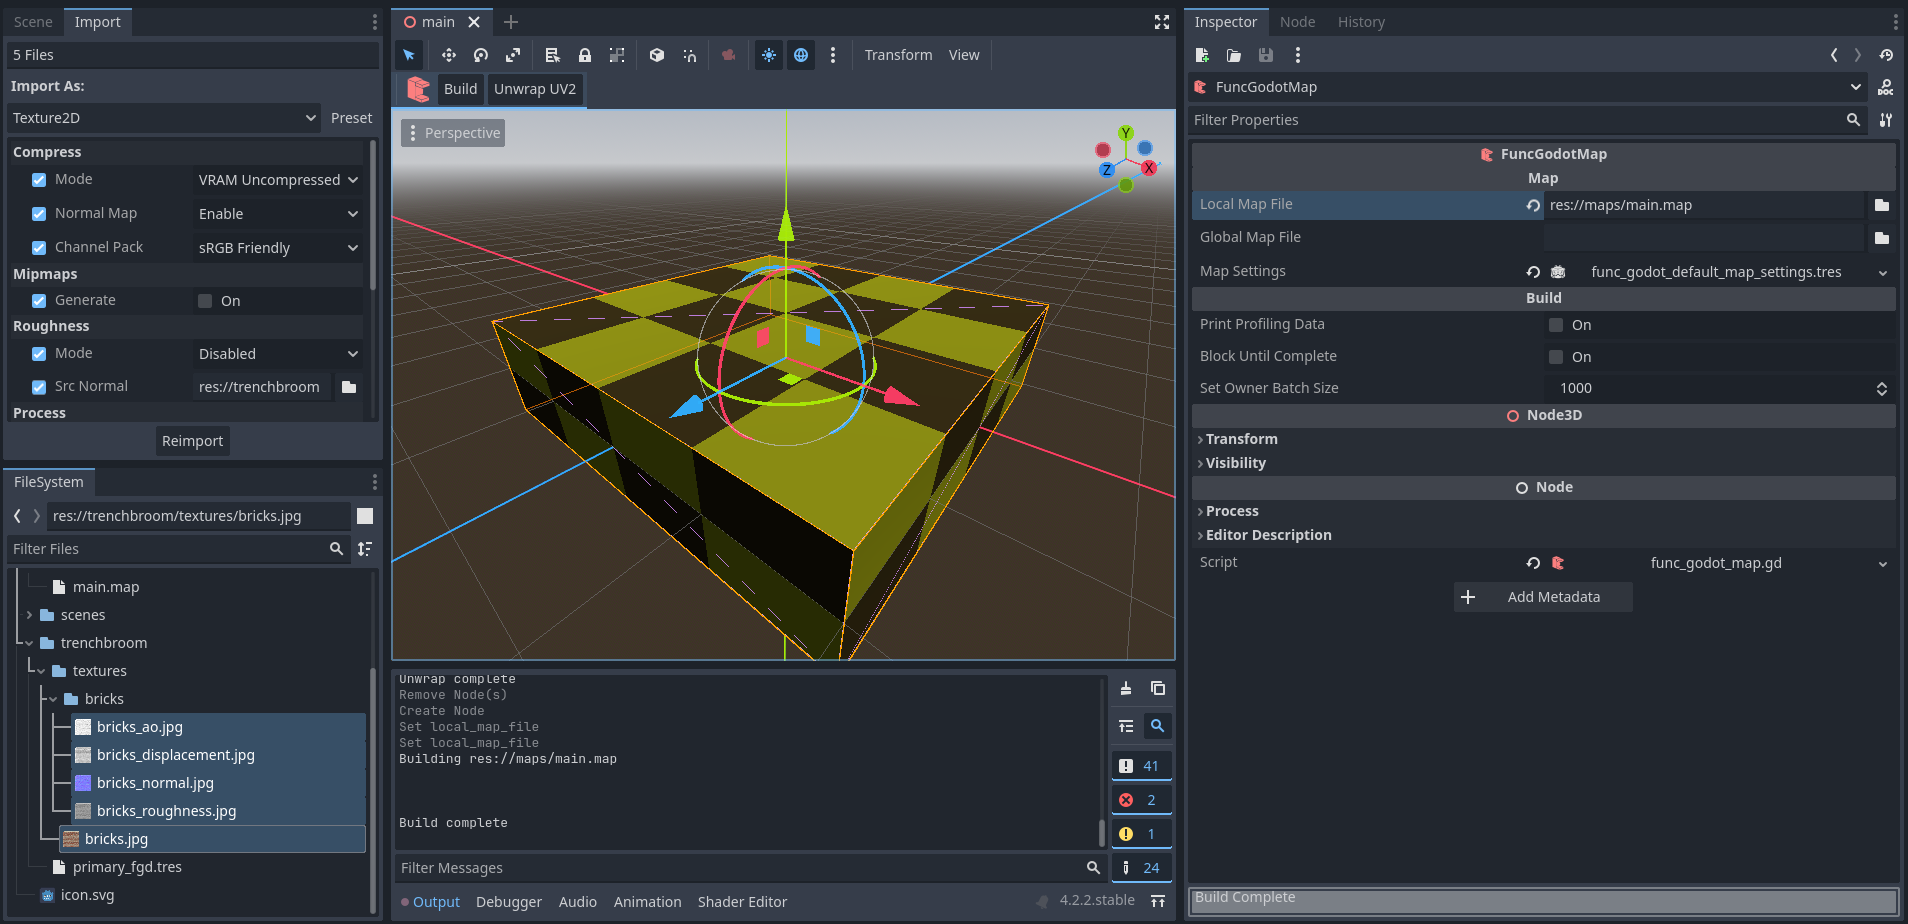
- In Godot select all your imported textures in the file browser
- Click "Import" at the top & ensure "mode" is "VRAM uncompressed"
- Click "Re-import"
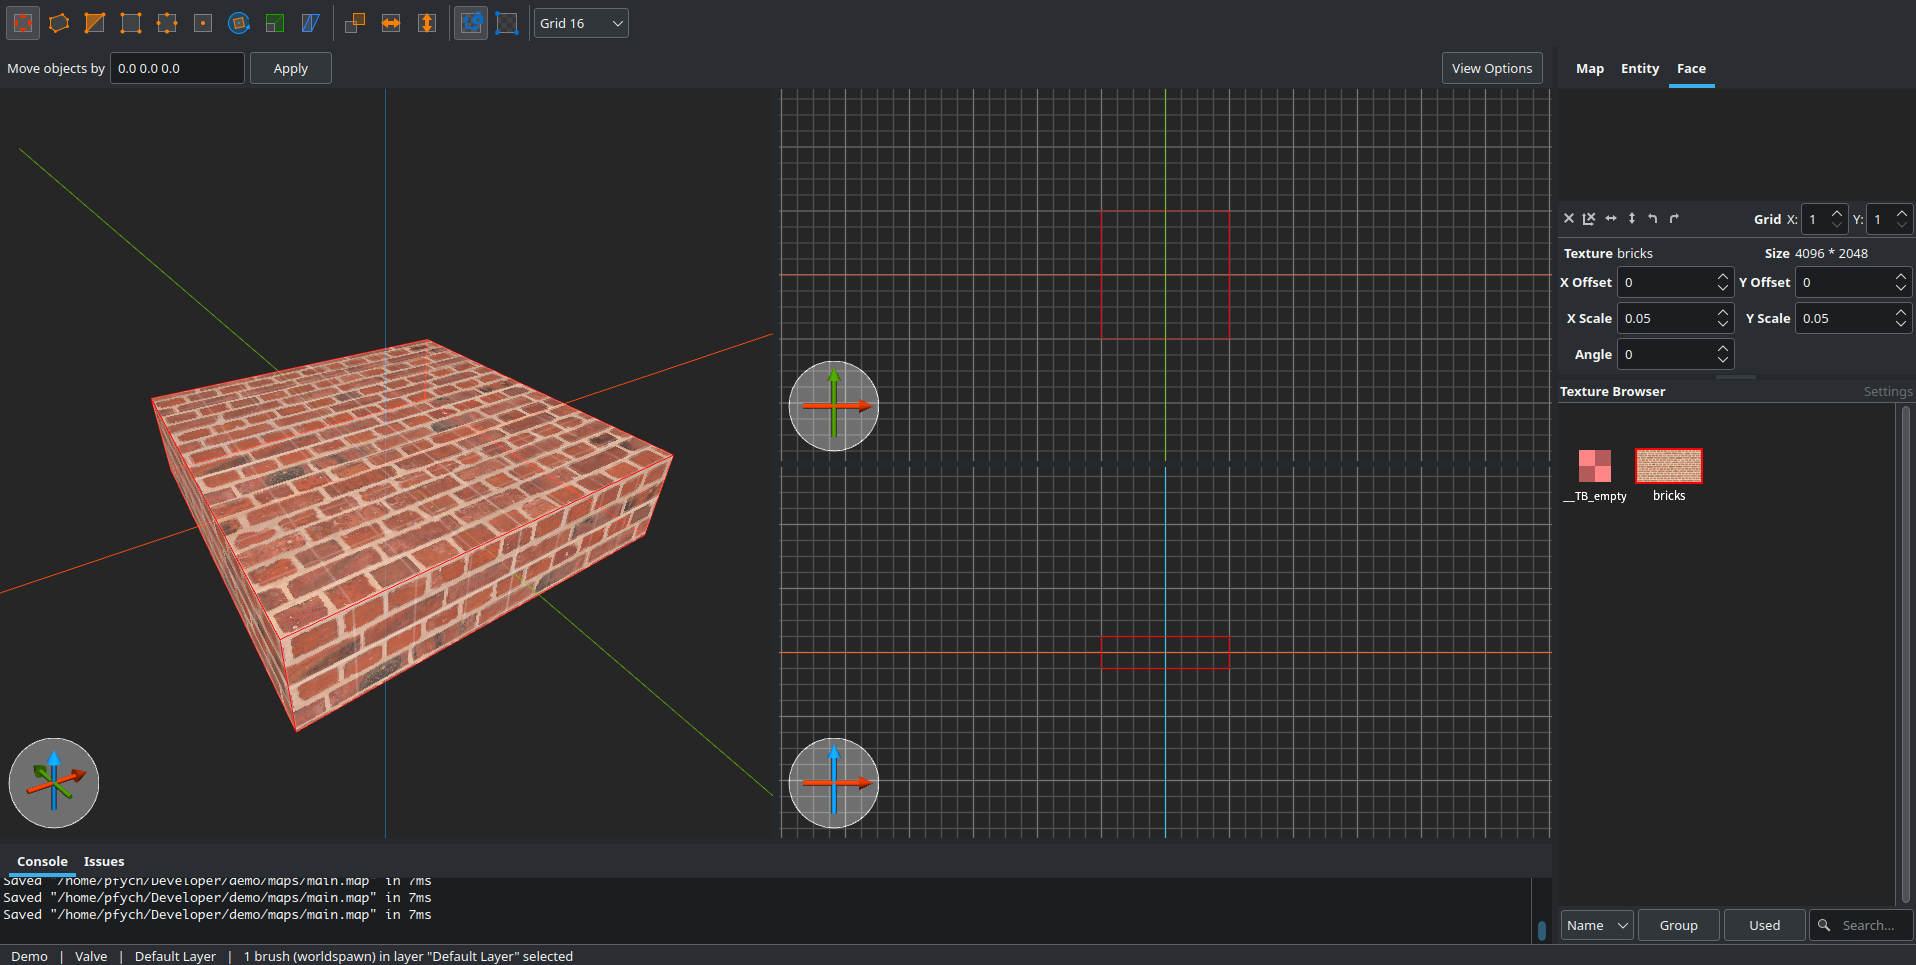
- Inside TrenchBroom press F5 or "File" > "Reload Texture Collections"
- You should now be able to apply the texture to brushes in
TrenchBroom
- With 4k textures - I usually set the scale to
0.05
- With 4k textures - I usually set the scale to
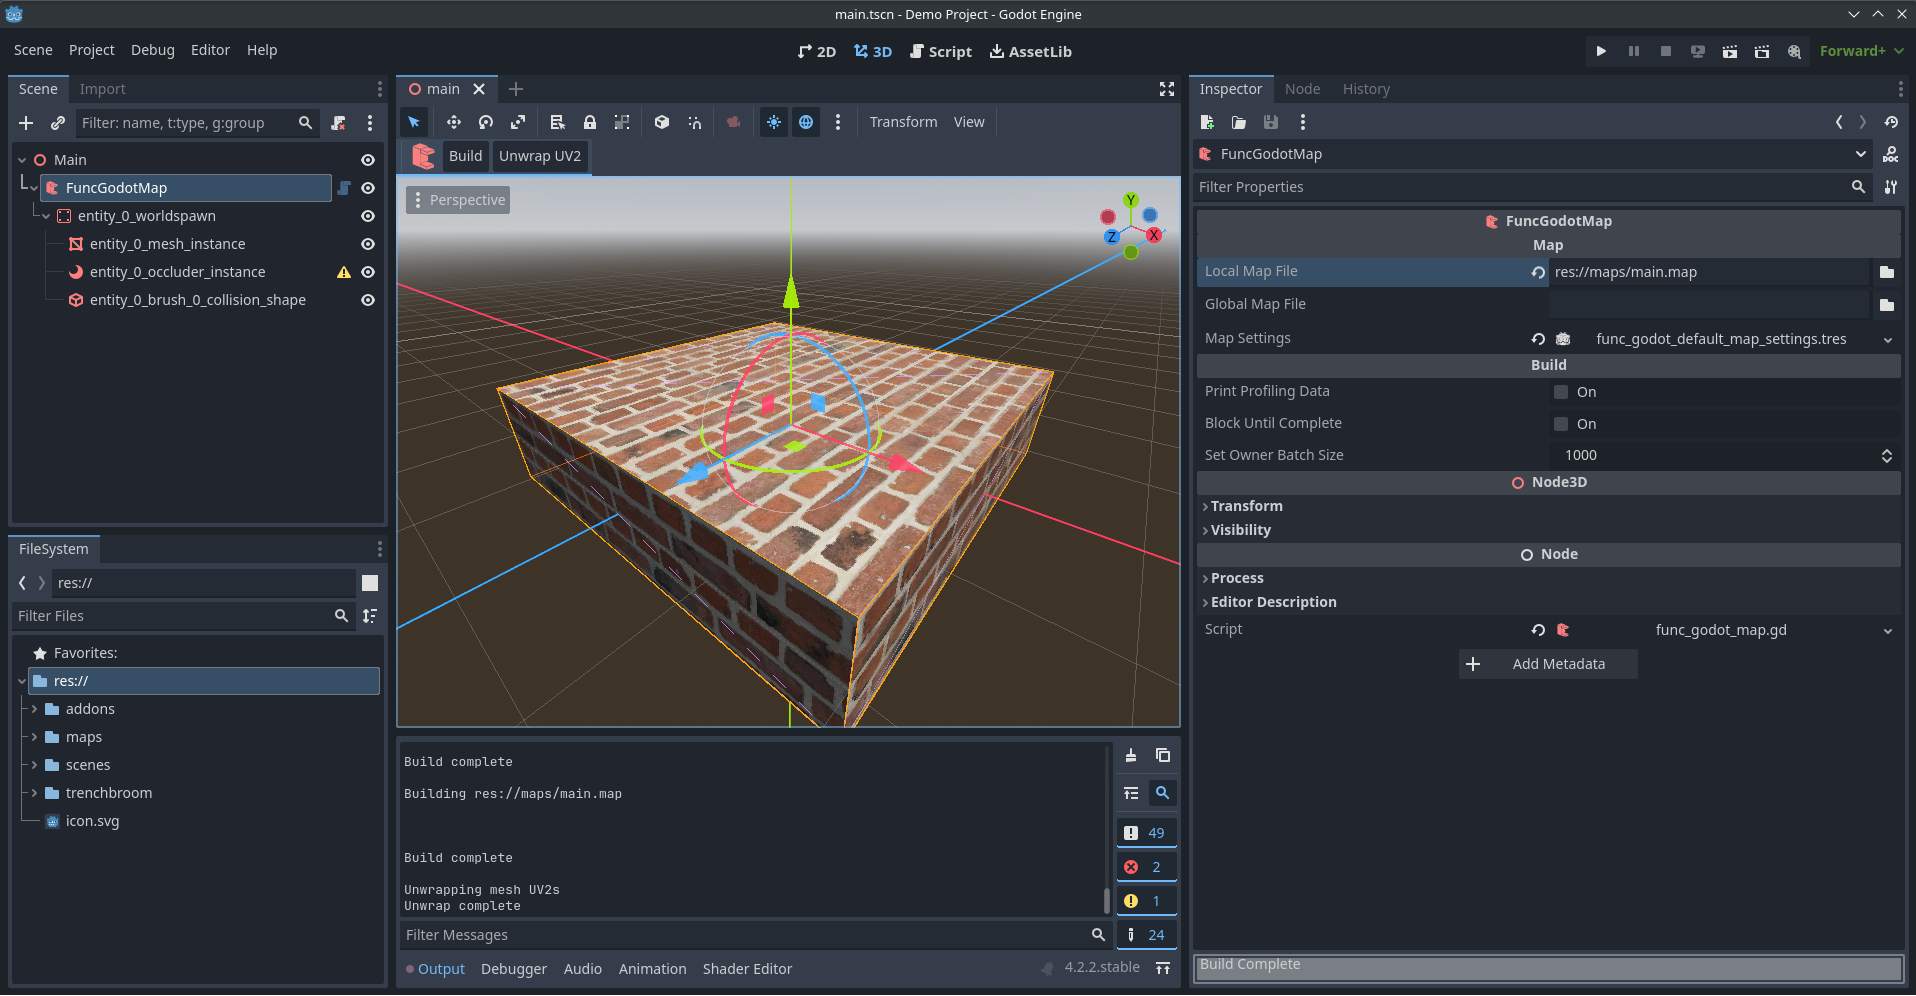
- Back in Godot - Select your
FuncGodotMapnode and click "Build" & "Unwrap UV2". You should now see your texture applied.- You can confirm all your materials applied correctly by
checking the generated
.tresfile in your textures folder- i.e .
res://trenchbroom/textures/bricks.tres
- i.e .
- You can confirm all your materials applied correctly by
checking the generated
Custom Entities
Jumping over into a different project (configured the same way), you may want to place entities such as lights, enemies, the player, etc. in your map via TrenchBroom. This can be quite complex however I have figured out the following
Placing Scenes via TrenchBroom
- Create the folder
res://TrenchBroom/entities - Right-click and "Create New" > "Resource"
- Create a
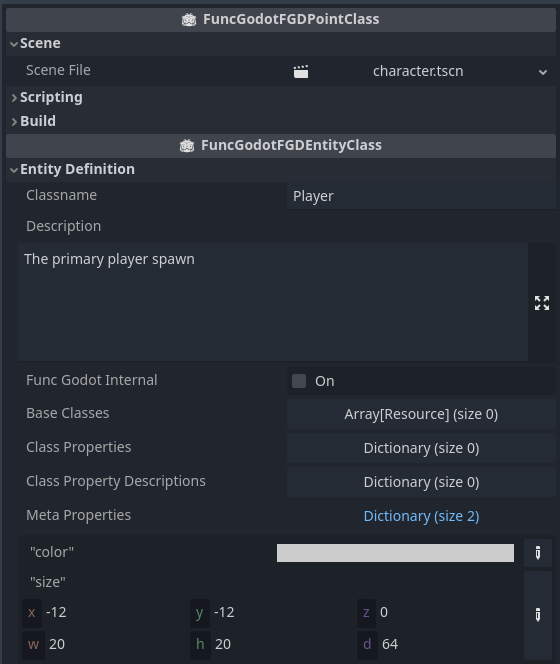
FuncGodotFGDPointClassand name it after your entity - Set the following values:
- Scene
- Scene File: The scene you want to
create
- i.e.
character.tscn
- i.e.
- Scene File: The scene you want to
create
- Entity Definition
- Class Name: The name of the entity in TrenchBroom
- Description: The description of the entity in TrenchBroom
- Meta Properties: The size and colour of the entity in TrenchBroom
- Scene
- Open
res://TrenchBroom/primary_fgd.tres - Under "Entity Definitions" add your new
.tresfile - Click "Export File"
- In TrenchBroom, ensure the entities mod is enabled in the "Map" tab and press F6 or "File" > "Reload Entity Definitions" to reload entities
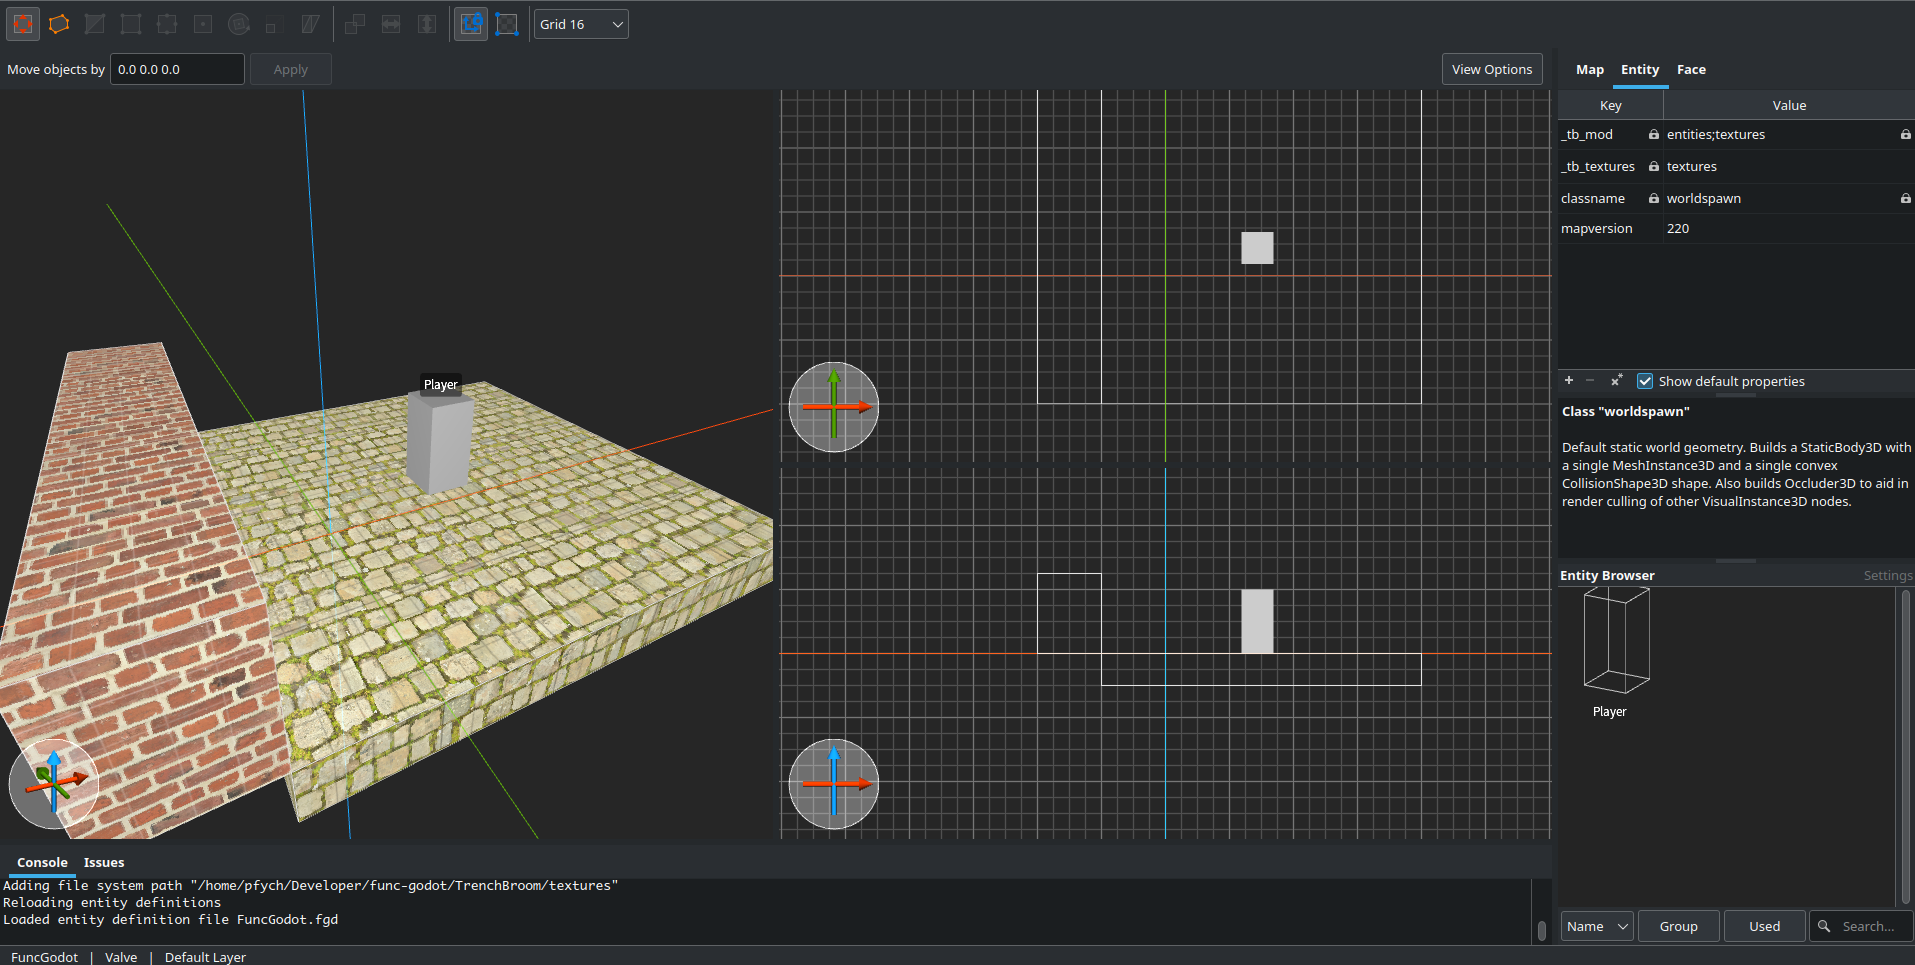
- Back in Godot re-build your map and your entity should be present
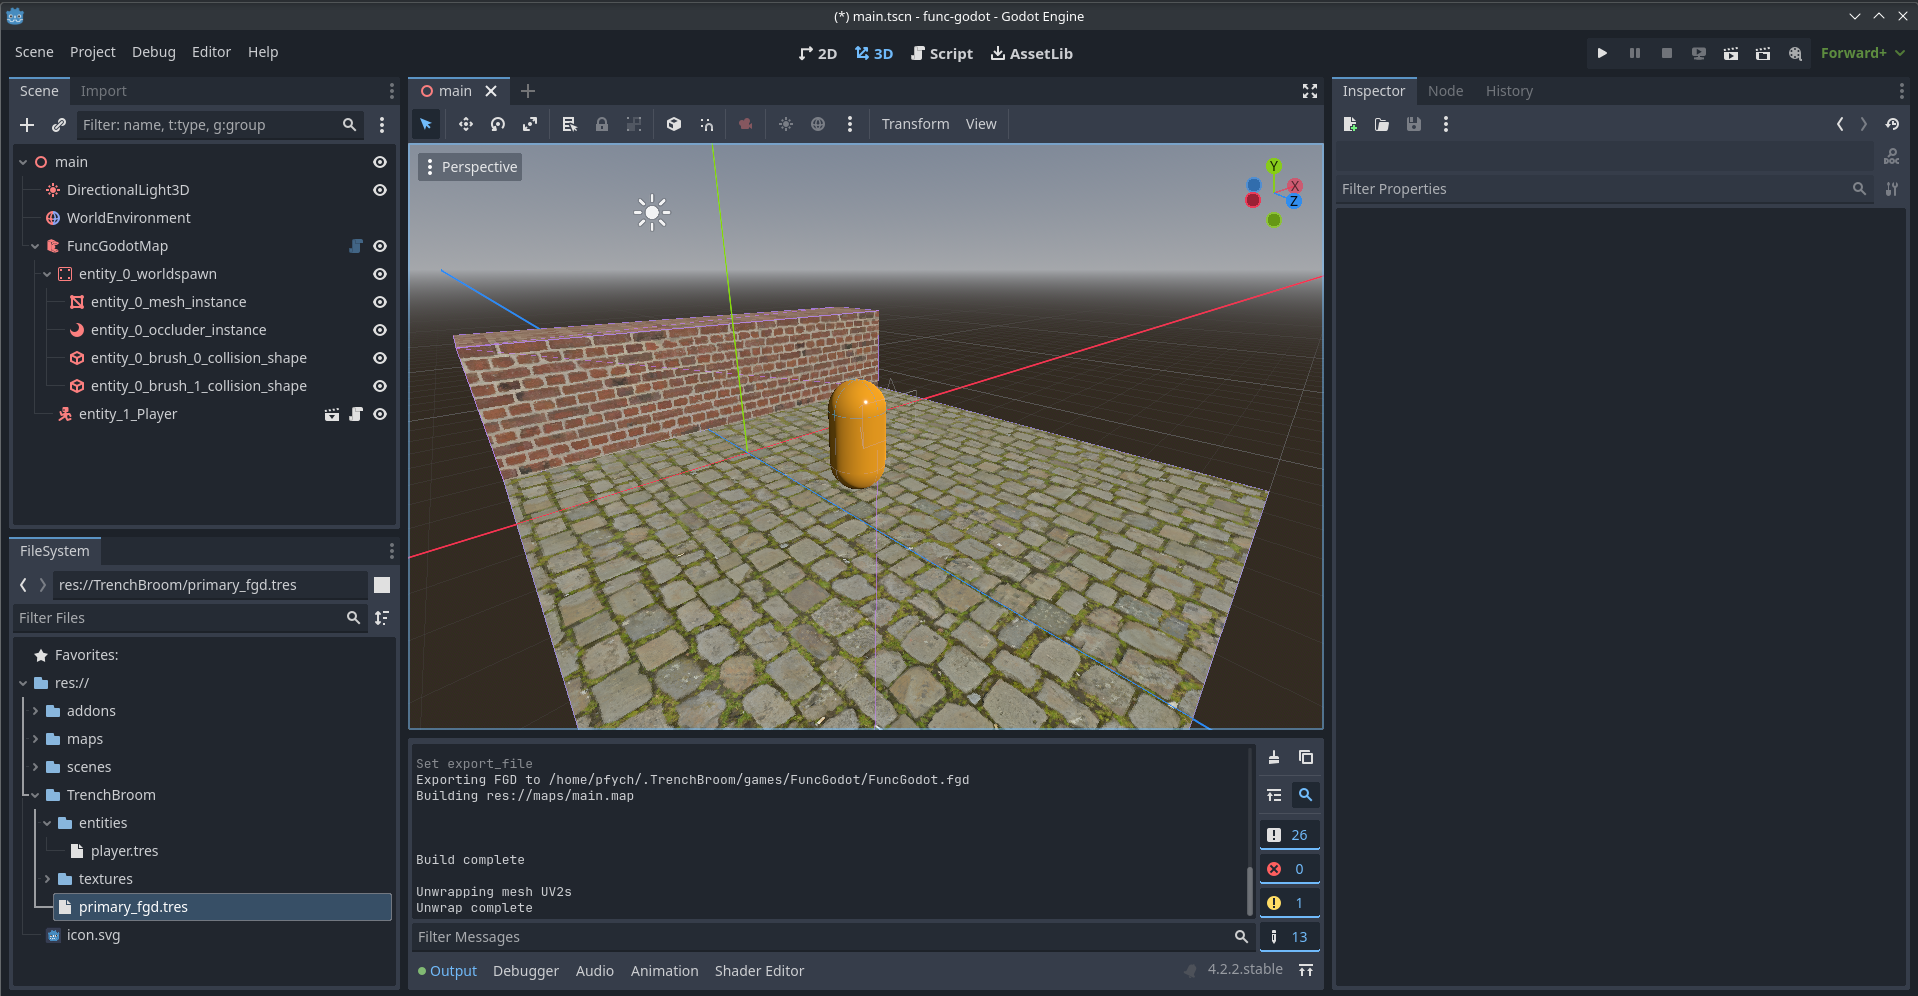
Placing nodes via TrenchBroom
Placing nodes like lights via TrenchBroom is a bit more complicated (I havent figured it out). But it's 100% possible & I've seen it done in the Discord. Once I have done it myself I will document the process here.
There are examples in this GitHub Repo which seem to work.